Feeds:
Posts
Comments

Archive for the ‘How-To’ Category

Yesterday, I had a ball with crafts and candy. I had two fun projects going on, both of which were a bit frivolous, but very amusing (to me at least).

My first project was to make some more cards. Ever since I received a bunch of rubber stamps from freecycle, I have been having a blast making my own stationary. I have always liked writing on pretty paper ever since I was a child. I always have a stack of blank journals sitting on the bookshelf ready to go, it is one of the few impulse buys that I still cave into.

The other wonderful project was Oreo Truffles. I found a wonderful recipe on Frugal Upstate that sounded too good to pass up. After seeing the recipe, I immediately walked over to the grocery store to get the ingredients to give it a try. I was not disappointed, in fact, they were even better than I imagined.

Oreo Truffles (slightly adapted from Frugal Upstate)

Makes approximate 2 pounds of truffles

Ingredients

  • 1 box of Oreo cookies (I used regular for the first batch, but I imagine that flavored Oreos would be divine)
  • 1 8 oz package of Neufchâtel or cream cheese
  • 1 package of white chocolate chips

Directions

  • Put Oreos in a food processor and run until fully crushed
  • Add the cheese is 1 inch strips and process until fully blended and starts to form a ball
  • In your palm, roll out little balls of the dough (about 3/4 inch in diameter)
  • Put on a cookie sheet and freeze for 1 hour
  • Melt the white chocolate in a double broiler, and dip each truffle into the chocolate. Put the truffles onto a lined cookie sheet once you dip them.
  • Put the sheet into the fridge to harden for about 30 minutes.
  • Store in an airtight box, separate the layers with wax or parchment paper, and keep in the fridge until serving.
  • Enjoy!

For more on cards and candy:
Read Full Post »

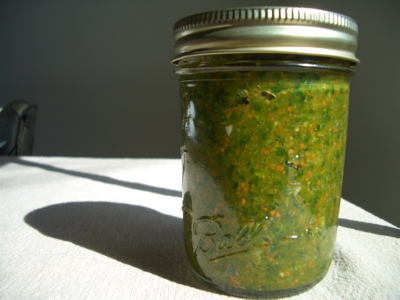
I’ve just finished my first recipe out of “Keeping Food Fresh”, and it was great. I try to keep enough vegetable stock around, but it is hard for me to always remember to replace it, so inevitably I end up using bullion every once in awhile. Now, I no longer will feel bad when I forget to make stock, because all I will need to do is whip out my very own homemade jar of instant soup stock.

This recipe is fun and easy, because all it involves is using a food processor to grind up the vegetables, and then adding salt. The salt keeps it from spoiling, and according to the recipe it can last up to 3 years. This is great because it makes a fair bit of stock. I think that I am going to put half in small jars to use as presents.

Stock in a Jar

Migaine De Thezou (Mixed Vegetable Stock)

Adapted from “Keeping Food Fresh” by The Gardeners and Farmers of Terre Vivante (this book is out of print, their second edition is called “Preserving Food without Freezing or Canning,” but I am uncertain if this recipe appears in that book.)

Ingredients

  • 1 Ib. leeks
  • 1 Ib. carrots
  • 1 Ib. onions
  • 3/4 Ib. parsley
  • 1/2 Ib. turnips
  • 1/2 Ib. celery
  • 10 cloves of garlic
  • 1 Ib. salt (I prefer sea salt or kosher salt)

Directions

  • In a food processor, grind up all ingredients. You will probably have to do this in batches.
  • Put the mixture in a large bowl and stir till well combined.
  • Cover and let sit overnight.
  • Remix and put in jars.
  • Store in the cellar or some other cool place.
  • Use 1 Tbs for every 2-3 cups water in soup, or to taste. I would also cut back the amount of salt you add to any soup recipe, because this stock has a fair bit of it already.

————-

Old-fashioned food preservation:

Read Full Post »

I am in a popcorn eating frenzy!  Ever since I read Angry Chicken’s post on microwaved popcorn, I have been in heaven.  I’m not sure why it never occurred to me, but the prepackaged microwavable popcorn bags aren’t actually that special.  The only thing that makes them different is a plethora of unnatural, unpronounceable ingredients.

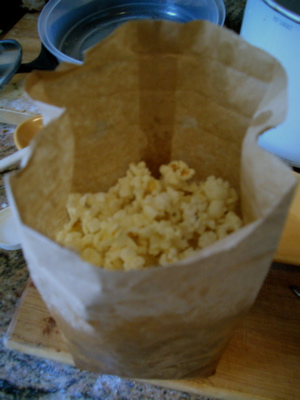
You can actually make your own microwave popcorn without any fancy equipment. All you need is a microwave, popcorn, seasoning, and a container. I started out using a lunch-sized paper bag (it’s cheap to get a pack of 80 from Target), but figured out that a glass mixing bowl with a lid works just fine as well.

The lid that I have has a couple vent slots, so if you are using a plate to cover the bowl with, use something to prop it up a bit, such as a wooden spoon. (Make sure that you don’t use anything metal)

Even the oil is optional, so it can be as healthy as you want it to be. Popcorn is great for you as long as you don’t load it up with a ton of oil. It only has 110 calories a serving, and 20% of your fiber intake, as well as 4 g of protein.  If you’re a salt addict like me, add some spice and cut out a bit of the salt, trust me it works wonders.

Microwave Popcorn

Becca’s Curry Microwave Popcorn

Serves 1

In microwave safe bowl (with loose fitting lid) or brown paper lunch bag: mix 1/4 c popcorn with a tsp. of oil, 1/4 tsp. salt and 1/4 tsp. curry powder.  Microwave until popping slows down to one pop every 2-3 seconds.  If you’re feeling decadent pour some melted butter over the popped popcorn.

Read Full Post »

Hubby and I both love Mexican food. Hubby’s particularly found of burritos, so after making up a huge batch of refried black beans last week, I decided to try my hand at homemade flour tortilla wraps.

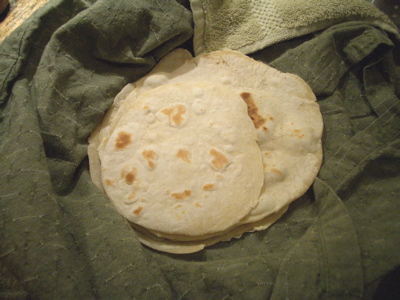
After three attempts, and a stock pot’s worth of the refried beans, I am finally ready unveil my recipe. It is really simple, and they taste divine. Don’t be spooked by the fact that kneading is required, it’s really not hard to do and I’ve decided that kneading is going to replace lifting weights as my upper body workout. Think of all the time that you can save at the gym. If you put on a great cd, it goes quickly and you get to dance while you’re working.

Homemade Tortillas

Homemade Flour Tortillas

makes approximately 10 tortillas, double as necessary

Ingredients:

  • 2 C flour
  • 2 Tbs oil, butter, or lard (lard is traditional, but oil has been working fine for me)
  • 3/4 C water
  • 1/2 tsp salt

Directions:

  • Put flour in mixing bowl and add oil. Stir to combine.
  • Dissolve salt in lukewarm water.
  • Add 1/2 C of the water to the flour mixture and mix with spoon until the water is fully mixed in.
  • Put on a wooden cutting board (or counter top) and knead with your hands, adding a little water at a time. Make sure that you don’t add so much that the dough sticks a lot to your fingers. Keep doing this until the water is added and the dough ball looks smooth and has few or no lumps. This should take 7-12 minutes.
  • Break off golf ball sized pieces and roll them into balls. Put into a bowl and cover for 30 minutes to let the gluten rest.
  • After letting the dough rest, heat a dry frying pan to medium-low heat.
  • Put a little flour down (to keep the balls from sticking) and roll each ball out with a rolling pin to about 5-7 inches in diameter, adding flour to the work surface and ball as needed.
  • You can cook as you roll out the next tortilla. Cook the tortilla on each side until it bubbles and light brown spots form on the cooked side.
  • Wrap the cooked tortillas in a clean kitchen towel as soon as each is done to keep warm for serving.
  • Enjoy!

——–

Check out some other make-it-from-scratch recipes:

Read Full Post »